
todays world require us to deepen and broaden our skills in everything that we do or face the alternative of outsourcing it to an expert.
Photography is no exception to this rule but while letting experts take care of your needs in the business world can be a wise decision nothing should stop you from improving your own private photography skills. While there is no real shortcut in this field either, there are; however, some very straight forward things you can do to see remarkable improvement in your everyday shots.
For me photography is a mindset and sort of a lifestyle where you look at the world in a whole different manner. I am not saying that you should become obsessed with it like myself but being able to step into the right mindset sure will help to take your own shots to the next level. There are some inevitable facts one must face but it very much comes down to how good you want to get and how willing you are to get there – money, time and energy wise. By this article I want to help you all on the path to becoming a better photographer for your everyday needs. I am a self taught visual interpreter (calling myself a photographer seems to piss off all the old school photographers that are of the opinion that you are only allowed to call yourself a photographer if you have been properly trained by a school). Am I the best at what I do? I don’t care, I have put in thousands of hours, learning and evolving in a lot of areas within this craft and it makes me feel good. Am I at the point where I want to be? not now and not ever I think but it makes me happy and as long as I get to a point to where it provides me with roof over my head and food on the table I keep on pushing to be the best that I can ever be. These are my observations along my journey that can perhaps help, inspire and motivate all of you people with a camera at home that you wish you put to better use.
You get what you pay for
You hear it all the time, the cameras are all so good now that it doesn’t really matter, its all about how innovative and skilled you are and some people ARE as good with mobile phones as with huge dslrs (in creative terms at least). Sure, there are some amazing talent out there but that does not mean that an average person can do the same. I do believe there is a huge difference in cameras but no matter how good the camera is, if you don’t understand the basics you won’t be able to take advantage of the tool. If you are to own the entire creative process yourself there are so many elements you need to control and work hard to become amazing and the competition is fierce out there. Whatever people say about camera gear, I do think you get what you pay for, being a camera house, lens, tripod etc but it all boils down to how serious you want to take your photography. Researching what camera and lenses to buy should come from understanding the basics of what a camera and lens can do and your initial feelings towards what you think you like to photograph (trust me, this will change over time). Questions to have in mind and research would be things like, what is the difference between a zoom lens and fixed lens? Advantages and disadvantages. Why is a lens called 35 mm and another 70-200? What is the f-number? etc. Which brings us to my next point. The most important basics as simplified as I can make them.
The ever so important basics
Yes I will leave out some detailed stuff but we are not here to become professionals (yet anyways) so here it goes.
As a basic rule we aim to take a photograph with perfect exposure (unless you want darker or lighter exposure for a specific creative reason). What is exposure? I like to describe it as the perfect balance between light and dark to give ourselves a perfect middle ground in regards to light. So how do we get to this perfect exposure? Basically it consists of three elements, Aperture, shutter speed and iso. These are the three elements that need to work together to create the perfect exposure. I would like to put ISO within brackets as to me it is more of an emergency tool that you have at your disposal in case of. You will come to understand that photography is a discipline of many in case of situations and it sure falls under the classic saying that for every action there is a reaction.
So we are left with Aperture and Shutterspeed. When you see something called the f/number this refers to the aperture and are usually written like f/4 or f/1.2 etc and shutter speeds are usually written in the likes of 1/100th of a second, 1/10th of a second etc. Now the important thing to remember and to understand is how they affect each other and what is important to understand about them. Using the strengths of one of them usually comes at a cost on the other one. I won’t bore you with the specifics of aperture but easily explained it is how much light your lens lets into the cameras sensor, the LOWER the number the more light it lets in and the HIGHER the f-number the less light it lets in. What is the result of photographing on a LOW f-number? It comes down to your focus area.
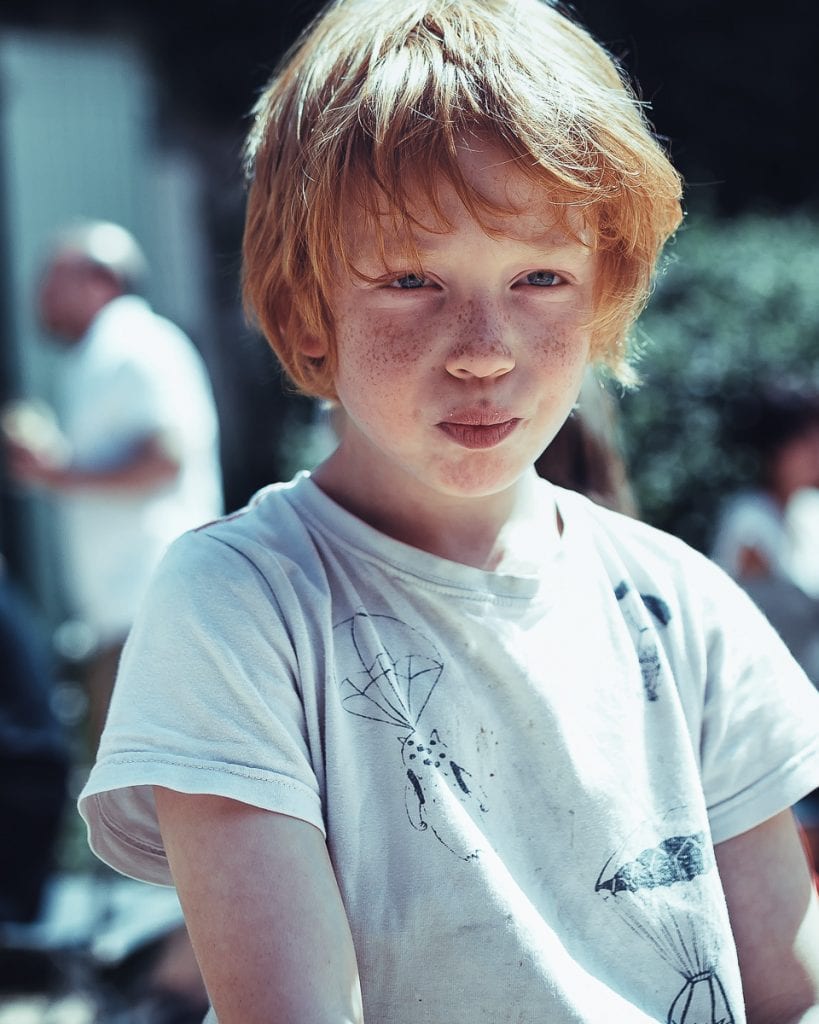
When you see the type of photos where a portrait is very sharp but the background is blurry, this is shot with a low f-number. What is the difficulty with a low f-number? To get everything in focus. Try photographing a group of people with a low f-number, then you will end up with some people in focus on some completely out of focus. What is the magic number making sure you get everything in your shot in focus? Very hard to say and only through practise you will learn what works.
Below you can see two examples, the left one shot at an f-number of 1.8 and here you see sharp focus on the face and a blurry background while in the photo on the right shot at an f-number of 14 you can see that more around the face is also in focus. This is the main difference when we talk about aperture and its f-numbers.

Now remember I mentioned that this usually comes at a cost in regards to its balancing partner who is shutter speed. Why is shutter speed important? The amount of light available dictates how much shutter speed you will be able to achieve and it is important for capturing moving objects and making sure you do not end up with blurry shots due to camera shake and motion blur.
Now to explain this better we can look at some scenarios and this is where you will connect the dots to how it interacts with aperture. Have the following in mind: The more available light you have available the higher the shutter speeds you can get so remember what we said about the aperture, the LOWER the f-number the MORE light the camera lets in so when you shoot at a low f-number your shutter speed will go up but lets say you want to photograph someone running in a field but you want everything in focus, that will mean you have to up your f-number to lets say f 14 but what will then happen to your shutter speed? YES you got it, it will decrease.
Now why is this important? The slower your shutter speed is, the more prone to motion blur you are. You can now in technical terms explain to why peoples random party evening photos are so blurry many times…Its because you fall down to such a slow shutter speed (due to little available light in the evening) that no matter how steady you are on your hands it will produce motion blur. So you go ahead and lower your f-number even more, but maybe you have already reached 1.4 for example and still it doesn’t give you enough shutter speed to take a sharp picture, well this is where our friend in brackets can offer some help, Miss ISO.
To explain her we can say that she makes Mr camera sensor more sensitive so by increasing your ISO you give yourself a better chance in low light conditions. But then why doesn’t one always use ISO, because…you guessed it, it comes at a price. All cameras are differently equipped to deal with increases in ISO but at one point increasing it too much will introduce grain so once again going back to our classic late evening pub party photos its very likely that you will see blurry and grainy shots and this is the reason for that. Of course there are flash solutions but that is a whole different ball game.
Lenses
When it comes to lenses it really comes down to what you like to photograph and understanding what the difference is between something like a 35mm and a 70-200 lens. As we have mentioned before, you have fixed lenses (the plain 35mm is an example of this)and zoom lenses (70-200 is an example of this). To simplify things one can say that the lower the number the more you can fit on your frame. Lets say you are standing in a room with a table with a vase on it. Shooting with a 35mm lens will enable you to almost fit the entire room with its surroundings in the frame while a higher number such as 100mm will only allow you to maybe fit the vase in your frame. Look at the examples below, the left shot is taken with a 35mm and you see how much you can fit into the frame even if you get quite close to your subject. The right shot is taken with a 70-200 zoom lens zoomed into 150mm.


So what is the preferred lens to buy? Once again, it all comes down to what you love to photograph but I can give you an insight to what my set up looks like. I have a 35mm that is fun to use as you can create outrageous angles which make for very unusual shots while it is also a great lens if you want to take beautiful and grandiose landscape shots as you can fit so much in the frame. My second lens is a 100mm macro lens which basically gives me two lenses in one. It works as a beautiful portrait lens and being a macro lens also gives me to opportunity to explore miniature worlds. All the extreme closeups you see of flowers and insects etc are taken with a macro lens so its a great one to have as you don’t need a spectacular environment around you to go and create something. The third lens is a 70-200 which gives me the ability to shoot anywhere between 70mm to 200mm which makes it a great lens for portrait photography as it gives you room to create a great variety. When you start out photography it is a good idea not to rely too much on a zoom lens as it forces you to physically move around in order to create your shot and that way you learn a lot faster (in my opinion).
Composition
What does it take to create a beautiful photo? In my opinion it consists of three basic elements, decent equipment, post production tools and a great composition. Lack in either one of these departments can ruin a picture in my opinion. If you don’t have decent equipment not even great post production skills nor a great composition will save you. If you have great equipment but sucks at composition yet amazing post production skills you still won’t end up with a great picture. and lastly if you have great equipment, amazing composition but sucks at editing you will also end up with a less than desired photo. As we have gone through the equipment department and post production being an entire chapter of itself I do believe composition skills really is the one area where you can have the biggest impact on your daily pictures.
Try to always draw attention to your subject by either isolating them or get the attention by using props or natural elements. Shock the audience by creating an outrageous contrast such as the example below.
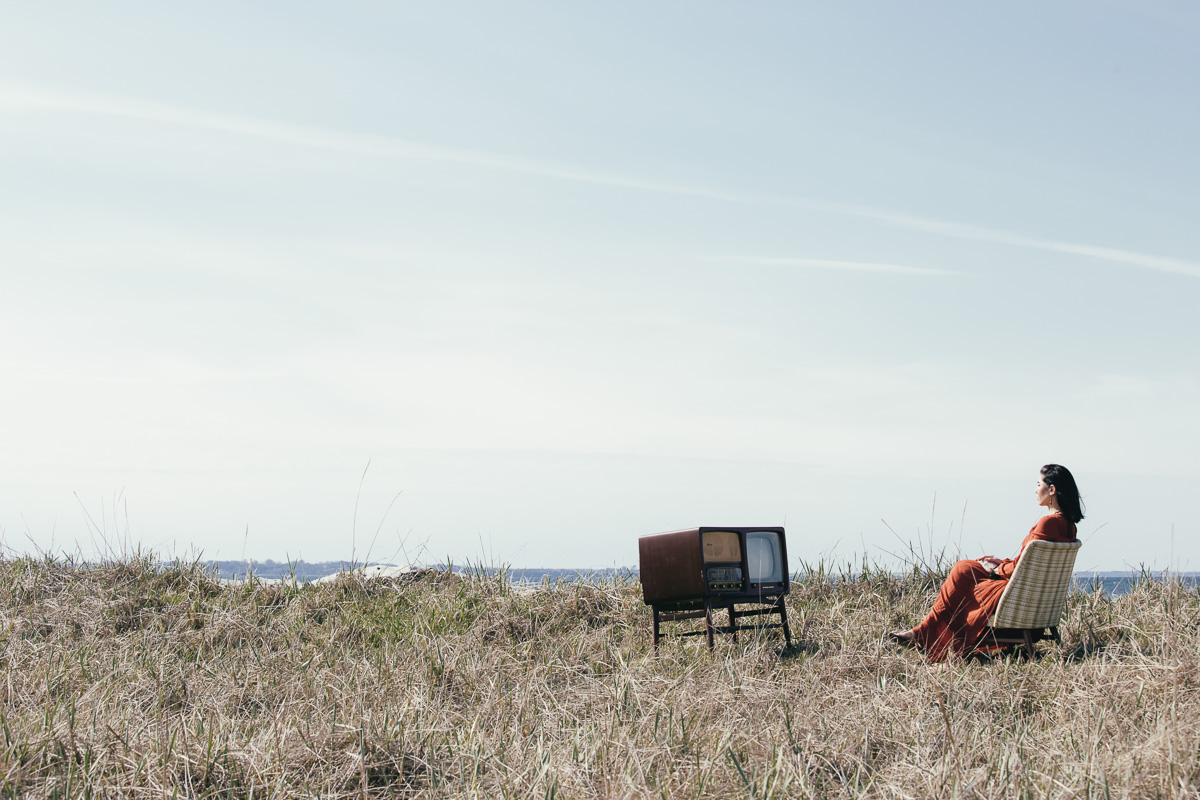
Use foreground in your photos to create a more dynamic feeling. See the example below.
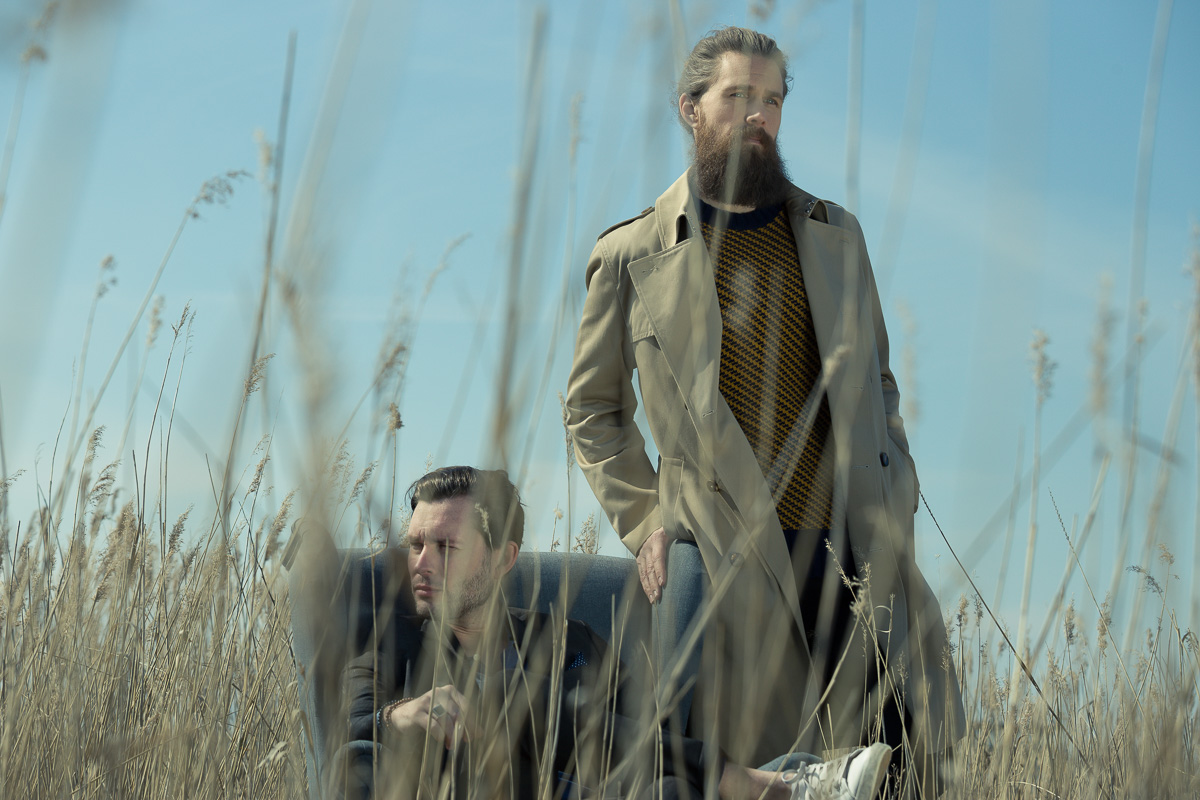
Don’t be afraid to cut the subject, don’t think that you have to fit an entire person in the frame. See examples below.


Don’t be afraid to get closer. You ll be surprised how well the pictures turn out by getting much closer to your subject.
 There a hundreds of compositional tricks and tips to look at but the most important thing is that you start to look at your pictures in a different way. Let the whole snapshot feeling go and take it a steep further. Evaluate your photos, compare them to photos you like.
What is also important to mention is the role of post production and editing. In my opinion its at least 50% of the work towards a beautiful photo but your post production should really be about polishing and enhancing what is already a great composition.
I hope this will help you guys with understanding at least the basics to help you understand what it is you are looking at when you look into that viewfinder of your camera.
All the best and good luck out there. Feel free to send me examples and I ll provide you with some feedback.
/Andreas